
The 4th of July is a time for fireworks, fun, and fabulous food.
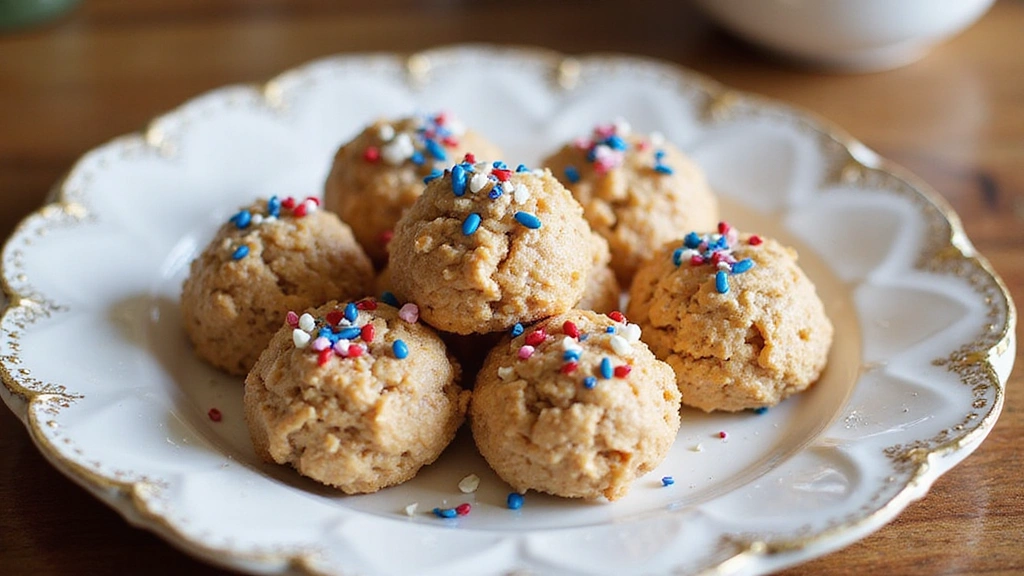
These Patriotic Puffs are the perfect festive treat, combining the nostalgic flavors of classic Rice Krispie treats with a patriotic twist.
With just a few ingredients and a splash of creativity, you can whip up these delightful snacks in no time.
The delightful crunch and marshmallow sweetness make them an instant crowd-pleaser.
Whether you’re hosting a backyard barbecue or attending a potluck, these treats are sure to stand out.
Get ready to impress your family and friends with these eye-catching and delicious snacks.
Contents
- The History and Cultural Significance
- Recipe Overview
- Nutritional Information (per serving)
- Essential Equipment Guide
- Ingredients
- Preparation Methods
- Step 1: Prepare Ingredients
- Step 2: Melt Butter
- Step 3: Add Marshmallows
- Step 4: Combine with Cereal
- Step 5: Transfer to Pan
- Step 6: Apply Decorations
- Step 7: Allow to Cool
- Step 8: Cut and Serve
- Critical Timing and Temperature Guide
- Pro Tips for Patriotic Puffs: Easy
- Troubleshooting Common Issues
- Variations and Regional Differences
- Food Science Behind the Recipe
- Frequently Asked Questions
- Serving and Presentation Guide
Recommended Products

Kellogg's is working with No Kid Hungry to provide free breakfast to children in need; Ends May 9, 2023; See packaging for more information

A classic, family-favorite cereal, perfect for breakfast and treat-making; Enjoy with your favorite milk or as part of The Original Treats recipe

4 SIMPLE INGREDIENTS: Crafted with rice, sugar, salt, and malt, plus 8 vitamins and minerals; Made with USA rice and no artificial colors or flavors
The History and Cultural Significance
• Patriotic Puffs: Easy traces its origins to the United States in the 1930s, where it was originally created by Kellogg’s as a promotional recipe.
• The dish evolved over decades as variations in decorations and added flavors were introduced, eventually becoming the beloved version we know today.
• In American culture, this dish traditionally appears at Independence Day celebrations, symbolizing freedom and unity.
• While many variations exist across different regions, the authentic version maintains its core characteristic of crispy rice cereal and gooey marshmallow that sets it apart from imitations.
Recommended Products

One 21 oz bag of Jet-Puffed S'more Marshmallows


One 10 oz bag of Jet-Puffed Mini Marshmallows
Recipe Overview
Recommended Products
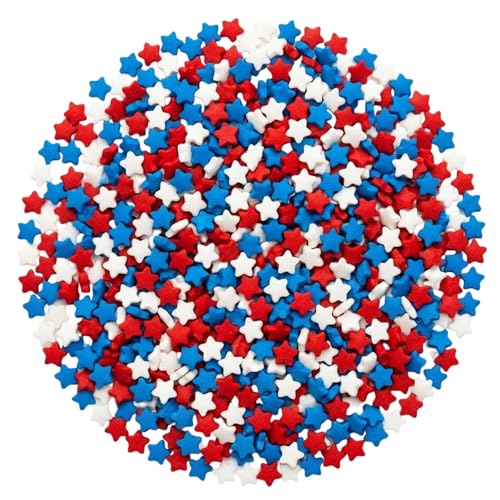
3.4 ounces of beautiful, sweet, and festive patriotic Star sprinkles.

🇺🇸 7 ounces of bright, beautiful, and festive Patriotic sprinkles

4th of July Sprinkle Mix – Red, white, and blue patriotic sprinkle blend designed for festive dessert decorating
Nutritional Information (per serving)
Essential Equipment Guide
Saucepan: A medium-sized saucepan is essential for melting the marshmallows and butter evenly. Look for a non-stick option to prevent sticking and burning, or use a heavy-bottomed pan for even heat distribution.
Mixing Spoon: A sturdy, heat-resistant mixing spoon is necessary for combining the melted marshmallow mixture with the cereal. Silicone or wooden spoons work best as they can handle the heat and won’t scratch your pans.
Baking Pan: A 9×13 inch baking pan is ideal for spreading the mixture evenly. A non-stick or lined pan ensures easy removal of the treats once they set.
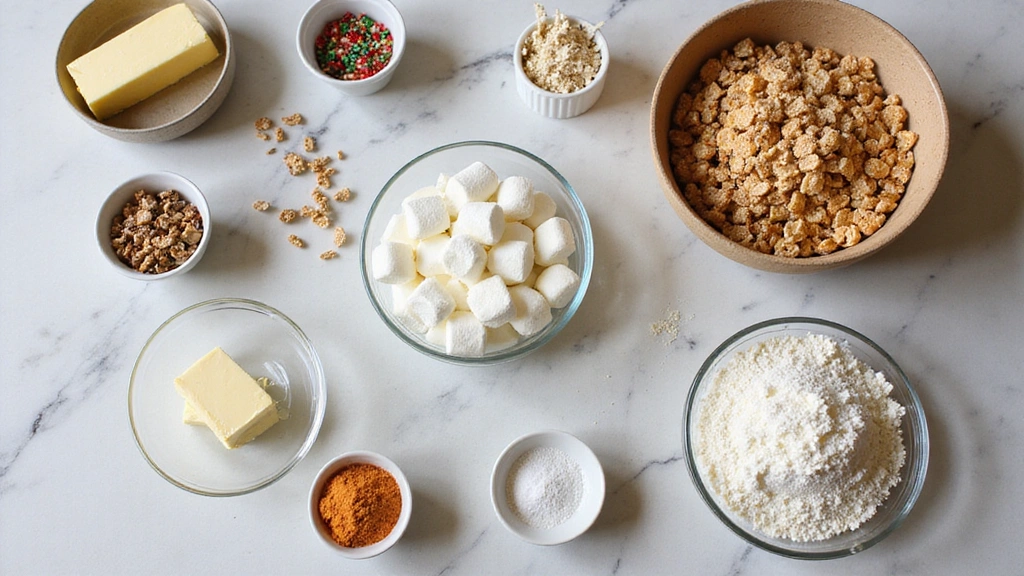
Ingredients
For the Base
|
| Amount | Ingredient | Notes |
|---|---|---|
| 3 tablespoons | butter | adds richness and flavor |
| 4 cups | mini marshmallows | provides sweetness and binding |
| 6 cups | Rice Krispies cereal | creates crunch |
Decorations
| Amount | Ingredient | Notes |
|---|---|---|
| 1 cup | red, white, and blue sprinkles | adds festive color |
| 1 tube | red gel icing | for additional decoration |
| 1 tube | blue gel icing | for additional decoration |
Preparation Methods
Melting Marshmallows: The key to perfect Rice Krispie treats is gently melting the marshmallows with butter. This requires constant stirring over low heat to prevent burning and ensure a smooth mixture.
Mixing Technique: Properly incorporating the cereal into the marshmallow mixture is crucial. Use a folding motion to coat the cereal without crushing it, preserving the treat's texture.
Decoration Application: For a professional look, apply the gel icing and sprinkles while the treats are still warm but set enough to hold their shape. This prevents slipping and ensures even distribution.
Step 1: Prepare Ingredients
Measure out all ingredients before starting to ensure a smooth process.
Have the butter, marshmallows, and cereal ready to go.
Keep decorations handy for quick application.
This preparation prevents delays during cooking.
Step 2: Melt Butter
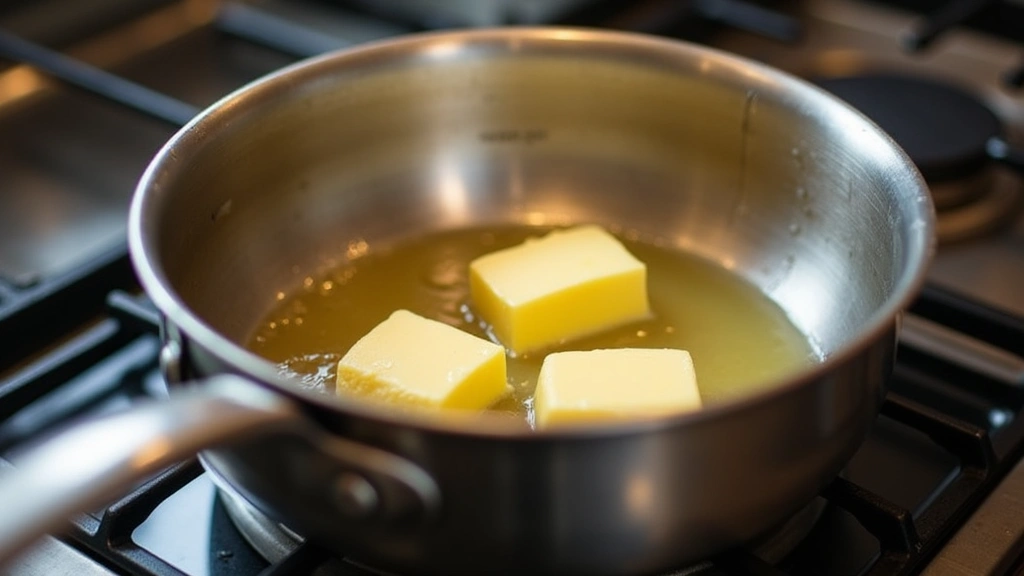
Place the saucepan over low heat and add the butter.
Stir gently as the butter melts completely.
Ensure the butter is fully melted without browning.
This creates a smooth base for marshmallow melting.
Step 3: Add Marshmallows
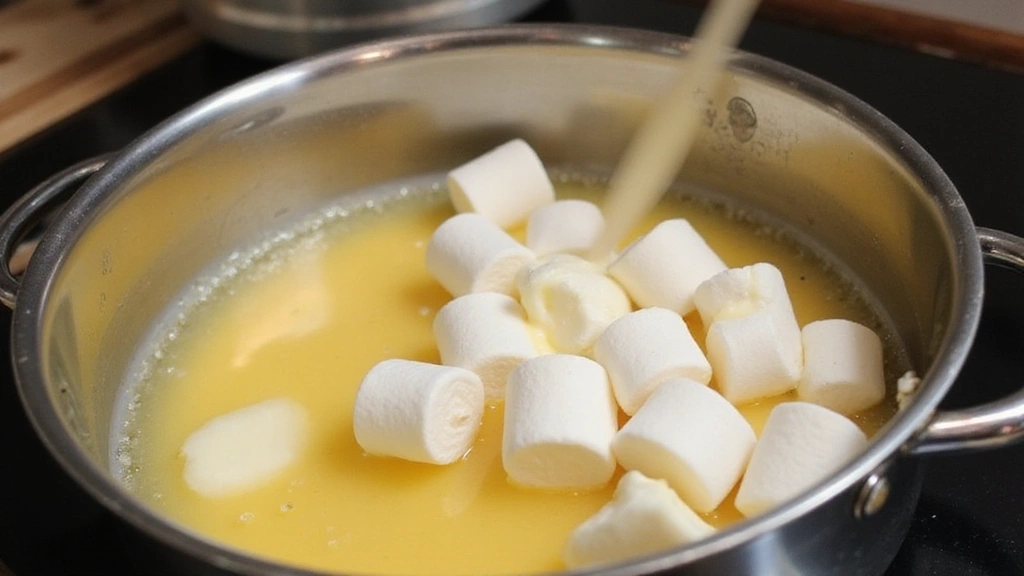
Add mini marshmallows to the melted butter in the saucepan.
Stir constantly to prevent sticking and burning.
Watch as the marshmallows melt into a gooey mixture.
This step ensures a homogeneous, creamy base.
Step 4: Combine with Cereal
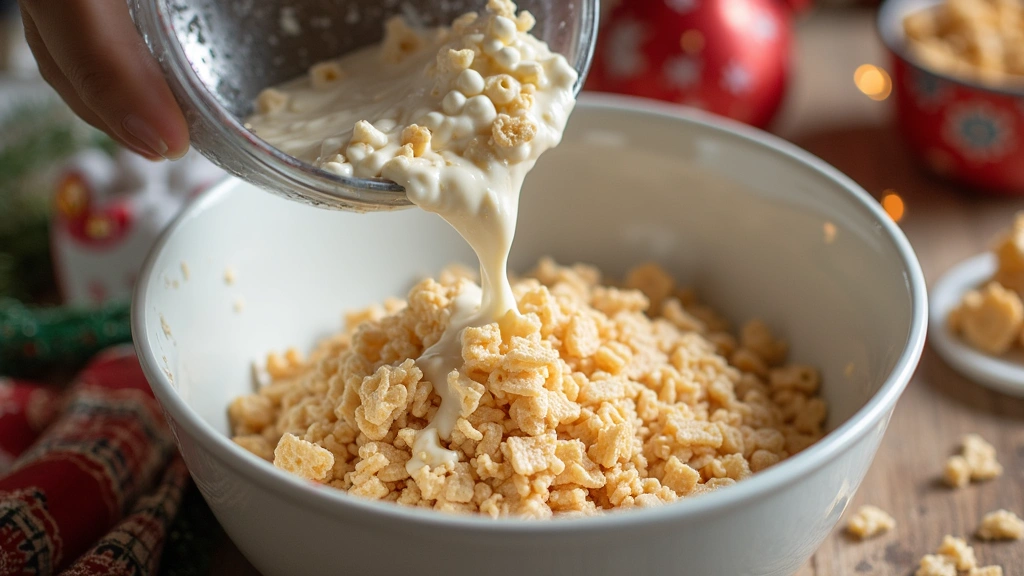
Remove the saucepan from heat and quickly add the Rice Krispies cereal.
Fold the cereal into the marshmallow mixture using a large spoon.
Ensure all cereal pieces are evenly coated.
This technique maintains the cereal's crunch.
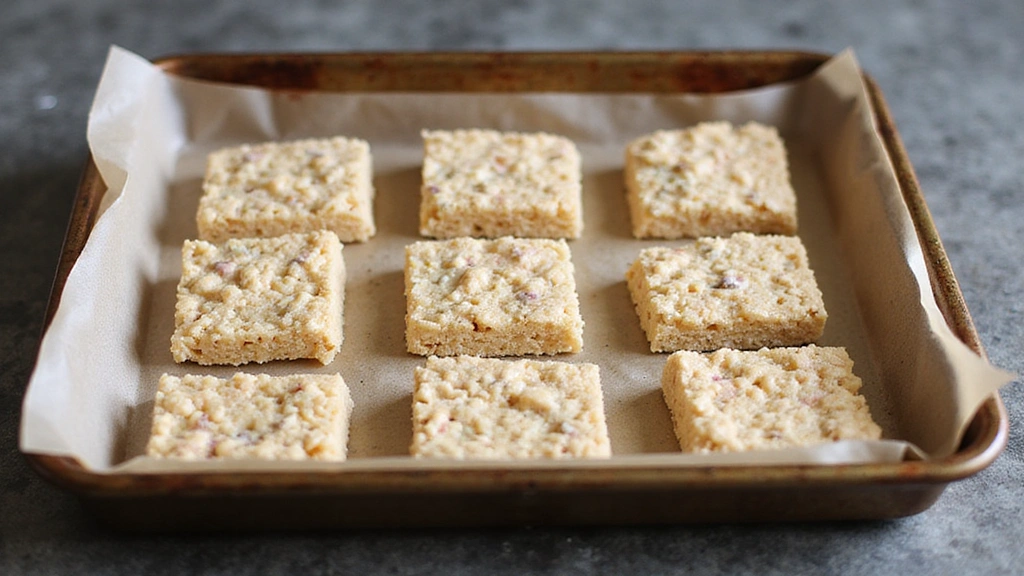
Step 5: Transfer to Pan
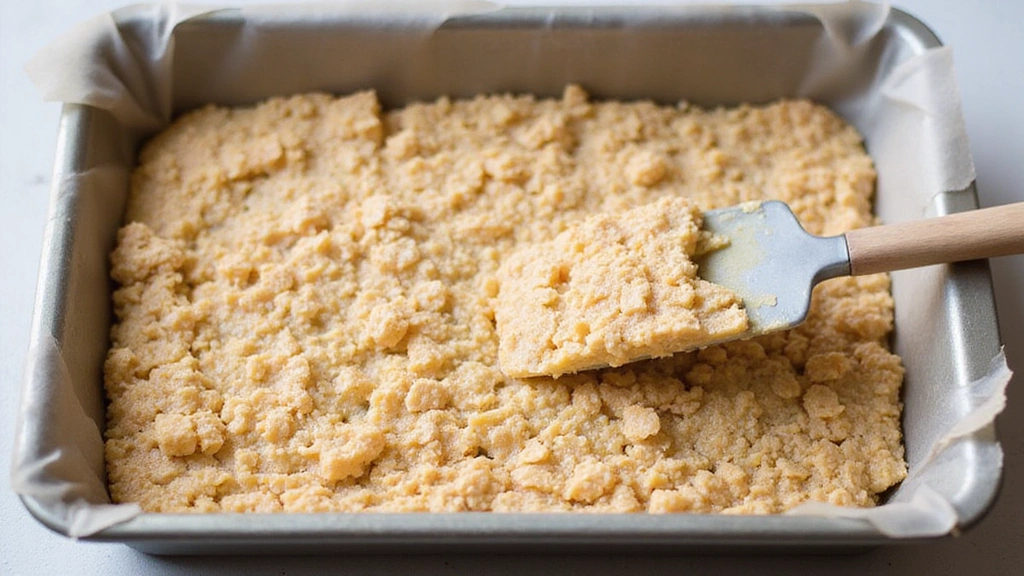
Lightly grease a 9x13 inch baking pan or line it with parchment paper.
Pour the cereal mixture into the prepared pan.
Press gently to spread evenly without compressing the cereal too much.
This step sets the foundation for even treats.
Step 6: Apply Decorations

While the mixture is still warm, sprinkle red, white, and blue sprinkles on top.
Drizzle red and blue gel icing in festive patterns.
Ensure decorations are pressed lightly to adhere.
This enhances the visual appeal of the treats.
Step 7: Allow to Cool
Let the decorated mixture cool in the pan at room temperature.
This allows the marshmallow to set and hold the shape.
Cooling takes approximately 20 minutes.
The treats should be firm but still slightly pliable.
Step 8: Cut and Serve
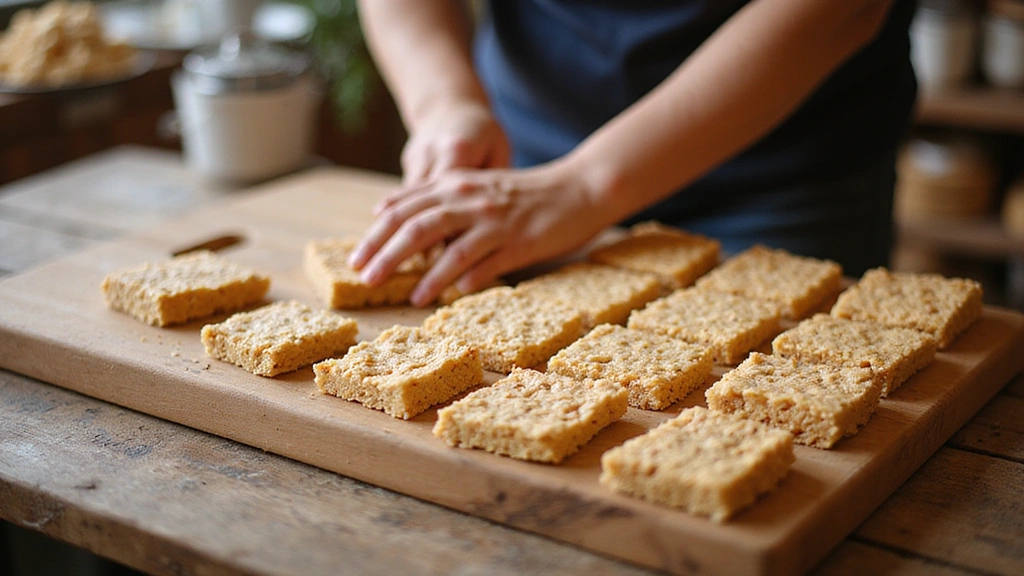
Use a sharp knife to cut the set mixture into squares or rectangles.
Serve immediately or store in an airtight container.
Ensure even cuts for uniform pieces.
This final step prepares the treats for serving.
Critical Timing and Temperature Guide
Melting Marshmallows: Keep the heat low to prevent burning. The mixture should be smooth and creamy, with no lumps of marshmallow remaining. Avoid overheating, which can result in a tough texture.
Setting the Treats: Allow at least 20 minutes for the treats to cool and set. They should be firm to the touch but not hard. Cutting too early can cause them to lose shape.
Decoration Timing: Apply sprinkles and icing while the mixture is warm but set enough to hold shape. This ensures even distribution without melting or sliding.
Pro Tips for Patriotic Puffs: Easy
• Ingredient Selection: Use high-quality butter and fresh marshmallows for the best flavor and texture. Stale marshmallows can result in a hard, less enjoyable treat.
• Preparation Secret: Lightly coat your hands or spatula with oil or water to prevent sticking when pressing the mixture into the pan.
• Temperature Management: Maintain low heat while melting marshmallows to preserve their elasticity and prevent graininess.
• Texture Enhancement: Gently fold the cereal into the marshmallow mixture to avoid crushing the cereal and maintain a light texture.
• Flavor Layering: Add a pinch of salt to the marshmallow mixture to enhance the sweetness and create a more balanced flavor.
• Make-Ahead Strategies: Prepare the Rice Krispie base a day in advance and add decorations on the day of serving for the freshest appearance.
• Restaurant-Quality Finishing Touches: Use a pastry bag for precise icing application, creating professional-looking designs.
• Equipment Optimization: Ensure your baking pan is thoroughly greased or lined to prevent sticking and ensure easy removal.
Troubleshooting Common Issues
• Texture Too Dense: This can occur if the cereal is overmixed or compressed too much. To fix, handle the mixture gently and avoid pressing it too firmly into the pan.
• Flavors Unbalanced: If the treats are too sweet, consider adding a pinch of salt to the marshmallow mixture to balance the flavors.
• Marshmallows Burned: Burnt marshmallows result from too high heat. Always melt on low heat and stir constantly to prevent this.
• Treats Sticking to Pan: Ensure the pan is well-greased or lined with parchment paper to prevent sticking.
• Decorations Sliding Off: Apply decorations while the mixture is still slightly warm to ensure they adhere properly.
• Inconsistent Shape: Use a ruler or guide to ensure even cutting for uniform pieces.
Variations and Regional Differences
• Classic Rice Krispie Treats: This version uses only the basic ingredients of cereal, marshmallows, and butter without any added decorations, focusing on the pure flavor.
• Chocolate Drizzle Variation: A popular twist involves drizzling melted chocolate over the treats before they set, adding a rich flavor dimension.
• Fruity Variation: Incorporates dried fruits and nuts for added texture and a burst of flavor, often seen in more health-conscious recipes.
• Holiday-Themed Treats: By changing the decorations, such as using green and red sprinkles, these treats can be adapted for various holidays beyond the 4th of July.
Food Science Behind the Recipe
• Emulsification: The melting of butter and marshmallows creates an emulsion, binding the ingredients together and providing the treats with their characteristic texture.
• Gelatinization: The heat causes the marshmallows to gelatinize, which helps trap air and gives the treats their light, airy structure.
• Caramelization: While not prominent, slight caramelization of the butter adds depth to the flavor profile, enhancing the overall taste experience.
Frequently Asked Questions
What's the most common mistake people make when preparing Patriotic Puffs? The most common mistake is using high heat to melt the marshmallows, leading to a tough texture. Always melt marshmallows on low heat for the best results.
Can I use large marshmallows instead of mini? Yes, but mini marshmallows melt more evenly and quickly. If using large marshmallows, cut them into smaller pieces before melting.
How do I store the treats to keep them fresh? Store them in an airtight container at room temperature for up to 2 days to maintain their freshness and texture.
Can I add food coloring to the marshmallow mixture? Yes, adding a few drops of food coloring to the melted marshmallows can create colored treats, perfect for themed events.
What's the best way to cut the treats? Use a sharp knife and wipe it with a damp cloth between cuts to ensure clean slices.
Are there any dairy-free options? Substitute butter with a dairy-free alternative like coconut oil or margarine for a dairy-free version.
Can I make these treats gluten-free? Ensure your Rice Krispies cereal is labeled gluten-free, as some versions may contain malt flavoring derived from barley.
Serving and Presentation Guide
• Traditional Presentation: Serve the treats on a patriotic-themed platter lined with parchment paper for a festive look.
• Individual Wrapping: Wrap each treat in clear cellophane tied with red, white, and blue ribbons for a personal touch.
• Stacked Presentation: Stack the treats in a pyramid shape on a cake stand, creating an impressive display.
• Party Favors: Place treats in small, decorated bags or boxes as take-home gifts for guests.
Conclusion
Patriotic Puffs are a delightful way to celebrate the 4th of July with friends and family.
Their simple preparation and festive appearance make them a perfect addition to any celebration.
Try this recipe and enjoy the sweet, nostalgic flavors of these iconic treats.
With a touch of creativity, you can make every occasion a little more special.