
Every holiday season, my kitchen fills with the sweet aroma of Christmas Rice Krispie Treats, a family favorite that never fails to delight.
The luscious combination of gooey marshmallows and crispy rice cereal creates a timeless treat that is both simple and irresistible.
With a hint of festive flair from seasonal additions, these treats are perfect for gatherings and celebrations alike.
Whether you’re a seasoned chef or a novice in the kitchen, this recipe promises a delightful culinary experience.
Join me as we explore how to transform these humble ingredients into a holiday masterpiece.
Get ready to create a dessert that both kids and adults will adore.
The History and Cultural Significance
• The Ultimate Holiday dessert traces its origins to the United States in the 1930s, where it was originally created by Kellogg’s to promote their Rice Krispies cereal.
• The dish evolved over decades as creative home cooks began adding various ingredients like chocolate and festive candies, eventually becoming the beloved version we know today.
• In American culture, this dish traditionally appears at holiday gatherings, symbolizing warmth and togetherness.
• While many variations exist across different regions, the authentic version maintains the balance of gooey marshmallow and crispy cereal that sets it apart from imitations.
Recipe Overview
Nutritional Information (per serving)
Essential Equipment Guide
Large Saucepan: A large saucepan is crucial for melting marshmallows evenly without burning. Look for a non-stick surface to prevent sticking, and ensure it has a heavy bottom for even heat distribution.
Wooden Spoon: Using a wooden spoon allows you to stir the mixture thoroughly without the risk of melting or damaging the utensil. It’s sturdy enough to handle the thick consistency of the marshmallow mix.
9×13 Inch Baking Pan: This pan size is perfect for achieving the ideal thickness for Rice Krispie Treats. If unavailable, any similar-sized dish can work, but make sure it’s non-stick or greased well.
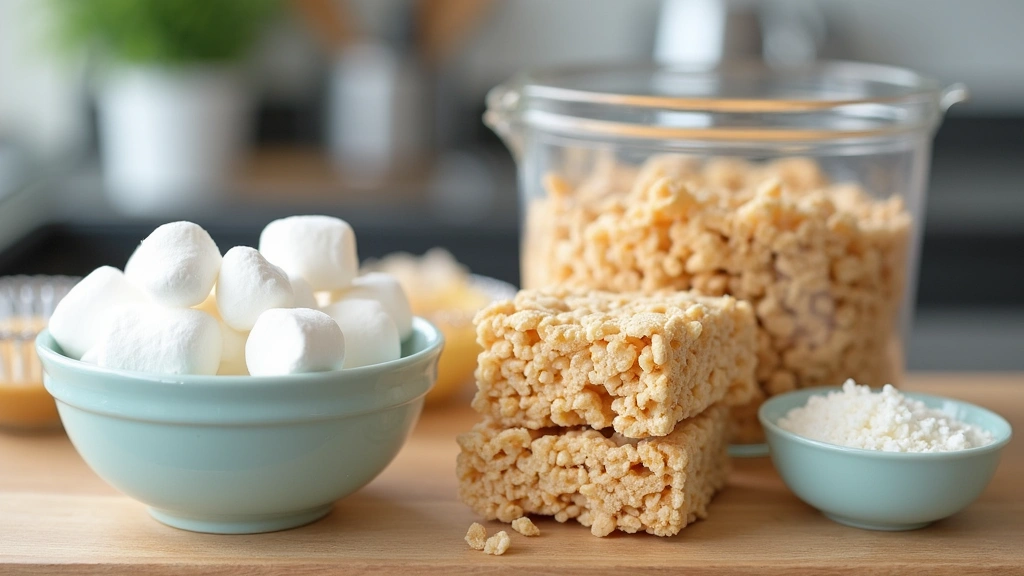
Ingredients
For the Base
|
| Amount | Ingredient | Notes |
|---|---|---|
| 3 tablespoons | butter | adds richness and flavor |
| 1 package (10 oz) | mini marshmallows | melt for gooey texture |
| 6 cups | Rice Krispies cereal | provides crispiness |
For the Decoration
| Amount | Ingredient | Notes |
|---|---|---|
| 1 cup | red and green candy sprinkles | adds festive color |
| 1 cup | white chocolate chips | for a sweet, creamy finish |
Preparation Methods
Marshmallow Melting: The key to a smooth mixture is melting marshmallows over low heat, ensuring they dissolve completely without burning. Constant stirring helps achieve a homogeneous texture.
Pressing Technique: When transferring the mixture to the pan, use a spatula coated with butter or wax paper to press it evenly. This creates a uniform texture and prevents sticking.
Decoration Distribution: Evenly sprinkle decorations over the surface while the mixture is still warm to ensure they adhere properly. Press gently with a spatula to secure them in place.
Step 1: Prepare Ingredients
Measure all ingredients before starting to ensure a smooth cooking process.
Organize them on the counter for easy access during cooking.
Ensure the marshmallows are fresh and soft for optimal melting.
Gather your equipment and have it ready to use.
Step 2: Melt the Butter
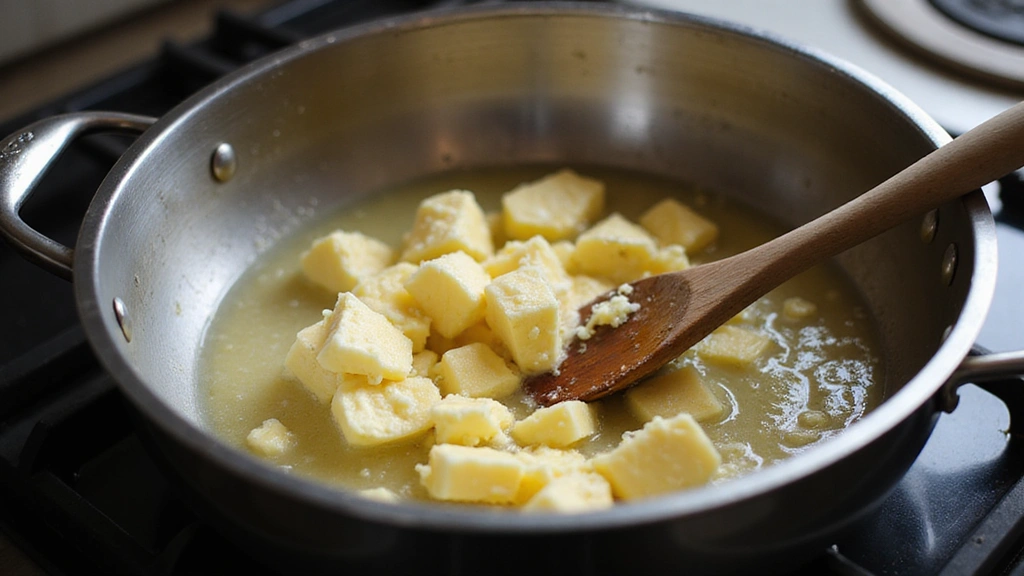
Place the large saucepan over low heat, adding butter.
Allow the butter to melt completely, stirring occasionally.
Ensure the butter is fully melted before adding other ingredients.
Avoid high heat to prevent burning.
Step 3: Add Marshmallows
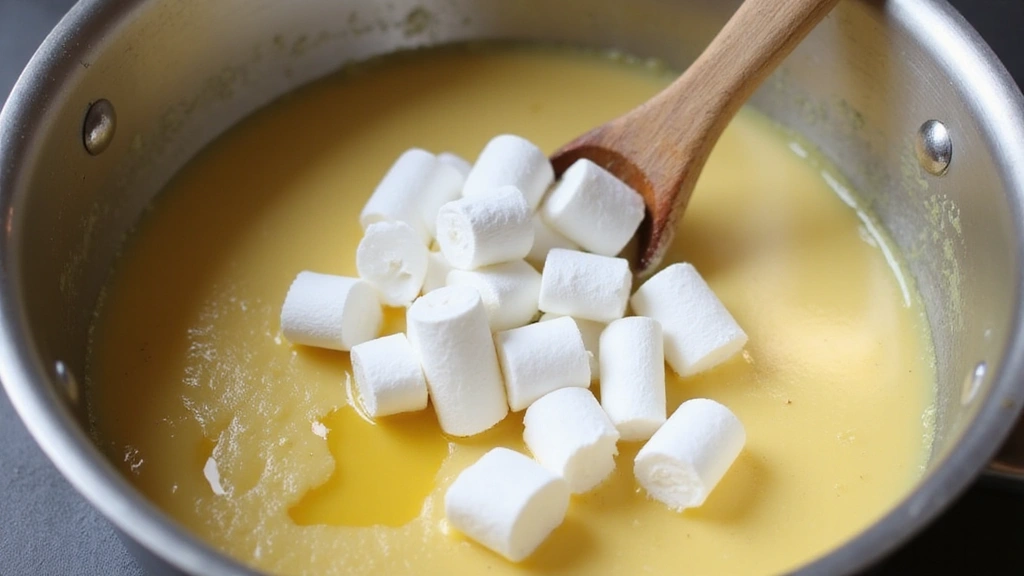
Add the marshmallows to the melted butter in the saucepan.
Stir continuously until the marshmallows are completely melted and smooth.
Look for a glossy, homogeneous mixture free of lumps.
Keep the heat low to avoid scorching.
Step 4: Combine with Cereal
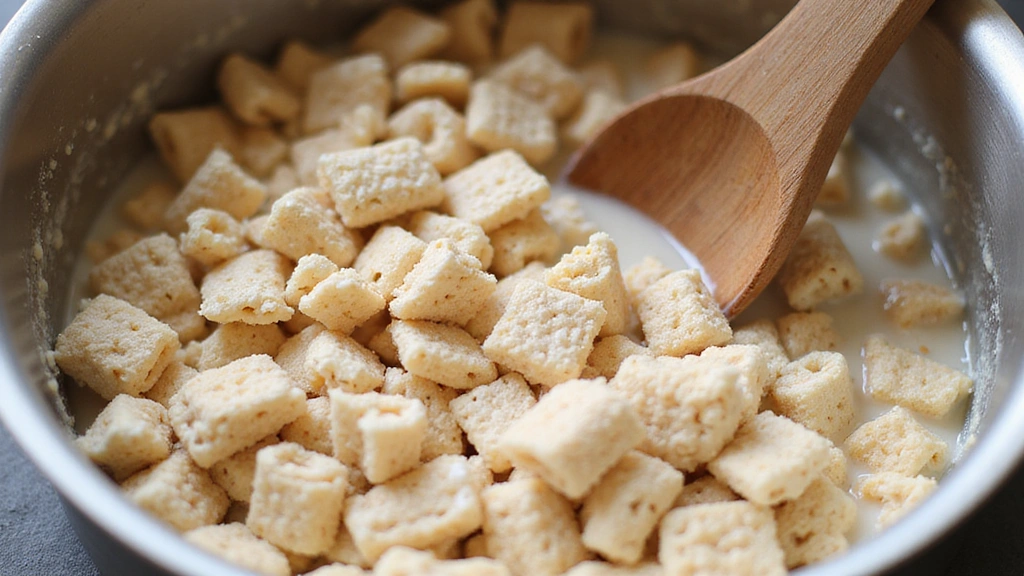
Remove the saucepan from heat and add Rice Krispies cereal.
Stir the mixture quickly to coat the cereal evenly with the marshmallow mixture.
Ensure all cereal pieces are covered for consistent texture.
Work quickly before the mixture cools and hardens.
Step 5: Transfer to Baking Pan
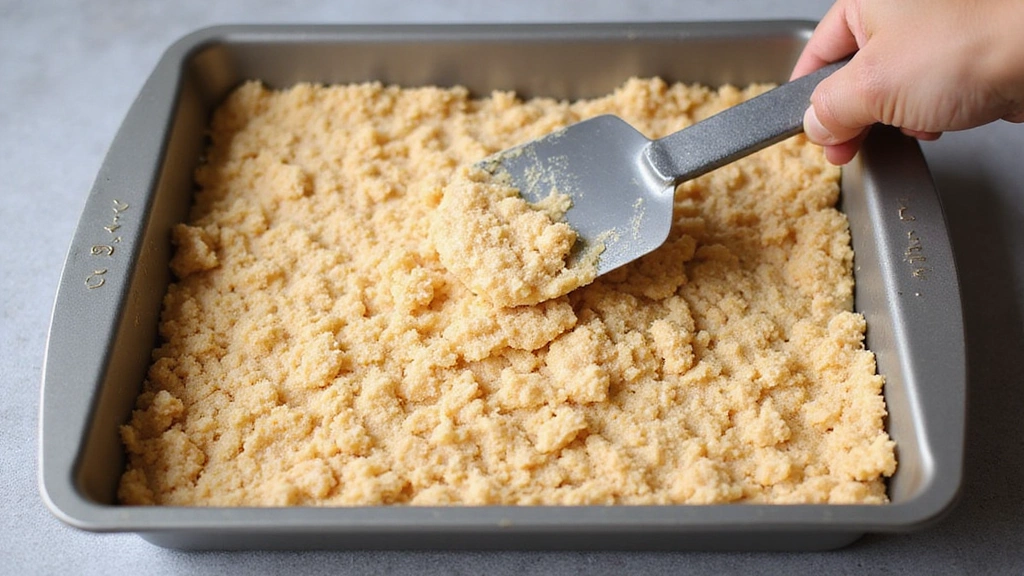
Grease the 9x13 inch baking pan lightly with butter.
Pour the cereal mixture into the prepared pan, using a spatula to spread evenly.
Press the mixture down gently for a flat surface.
Ensure the mixture is evenly distributed across the pan.
Step 6: Add Decorations
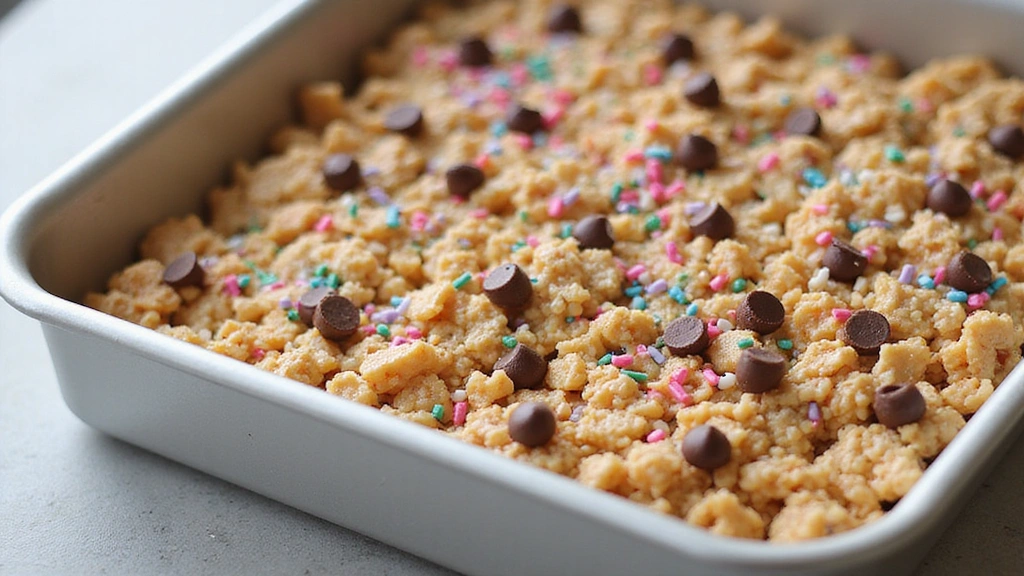
Sprinkle red and green candy sprinkles over the surface of the mixture.
Scatter white chocolate chips evenly for a festive look.
Press gently with the spatula to adhere decorations.
Ensure decorations are evenly distributed for visual appeal.
Step 7: Cool and Set
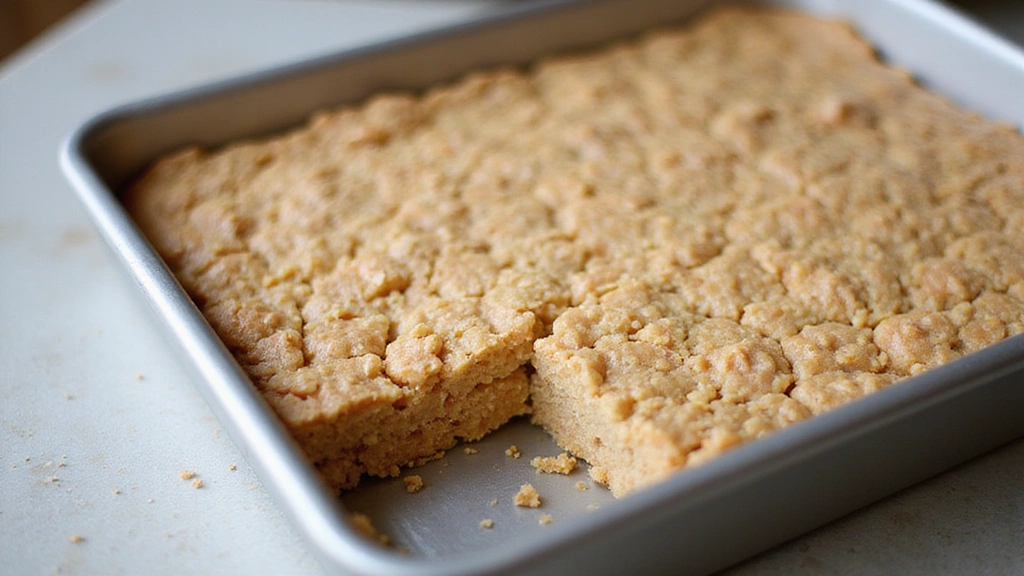
Allow the treats to cool at room temperature for at least 30 minutes.
Check for firmness before cutting into pieces.
Ensure the mixture is completely set for clean cuts.
Avoid refrigerating to maintain chewiness.
Step 8: Slice and Serve
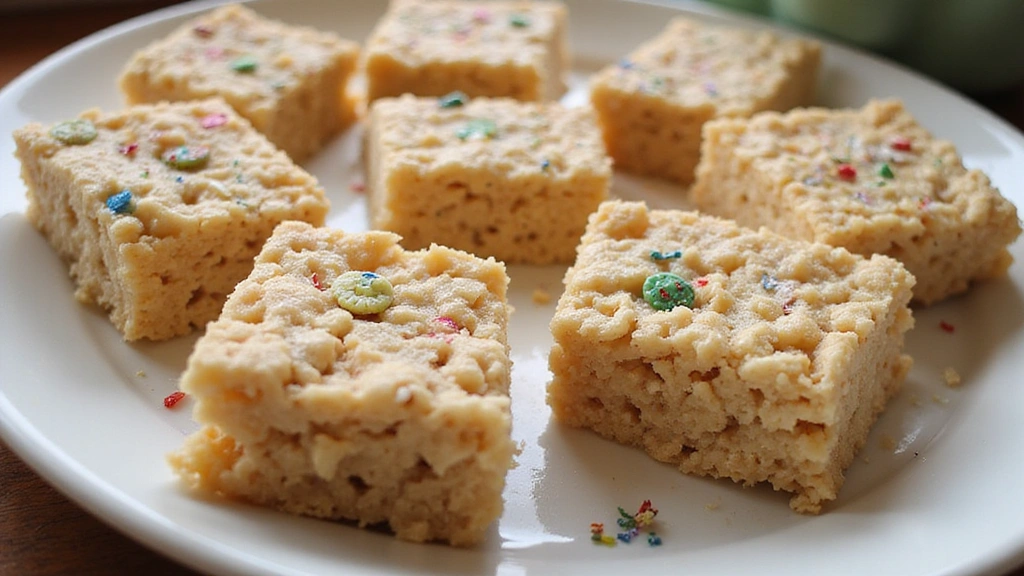
Use a sharp knife to cut the treats into 12 even squares.
Lift each piece gently from the pan using a spatula.
Arrange on a serving platter for easy access.
Serve immediately to enjoy the freshest taste.
Critical Timing and Temperature Guide
Melting Marshmallows: Keep the temperature low and stir constantly; marshmallows should be smooth and fully melted before adding cereal.
Pressing Mixture: Do this quickly while the mixture is warm, using gentle pressure to ensure even distribution without compacting.
Cooling Time: Allow at least 30 minutes at room temperature; rushing this can result in uneven texture or sticky cuts.
Pro Tips for The Ultimate Holiday
• Ingredient Selection: Use fresh marshmallows for optimal melting and avoid stale cereal to ensure the best texture.
• Preparation Secret: A touch of vanilla extract added to the melted marshmallow mixture can enhance flavor subtly but significantly.
• Temperature Management: All ingredients should be at room temperature for seamless blending and optimal texture.
• Texture Enhancement: Press the mixture gently into the pan to avoid compacting, which can lead to a dense texture.
• Flavor Layering: Incorporate a pinch of salt in the marshmallow mix to balance sweetness and enhance overall flavor.
• Make-Ahead Strategies: Prepare the base a day in advance and store in an airtight container; add decorations just before serving.
• Restaurant-Quality Finishing Touches: Drizzle with melted chocolate for an elegant, finished look.
• Equipment Optimization: Use a silicone spatula to prevent sticking and ensure every bit of mixture is used.
Troubleshooting Common Issues
• Texture Too Hard: Over-pressing the mixture can lead to hard treats; ensure gentle pressure is used when pressing.
• Marshmallows Not Melting Smoothly: This can occur if heat is too high or marshmallows are stale; use low heat and fresh marshmallows.
• Uneven Decoration Distribution: Ensure decorations are added while the mixture is warm, pressing gently to secure them.
• Sticky Cut Pieces: Allow sufficient cooling time before cutting, and use a greased knife for clean cuts.
• Burned Butter or Marshmallows: Keep the temperature low and stir frequently to avoid burning.
• Too Sweet: Balance sweetness by adding a pinch of salt to the marshmallow mixture.
Variations and Regional Differences
• Chocolate-Dipped Style: In this variation, the cut squares are dipped in melted dark chocolate, adding richness and a touch of bitterness.
• Peanut Butter Twist: This version incorporates a layer of peanut butter mixed into the marshmallow for a nutty undertone.
• Holiday Spiced Version: Add a teaspoon of cinnamon and nutmeg to the marshmallow mix for a seasonal spice profile.
• Vegan Alternative: Use vegan marshmallows and plant-based butter for a vegan-friendly treat that maintains the classic flavor and texture.
Food Science Behind the Recipe
• Starch Gelatinization: This principle explains how heat causes the starch in the cereal to expand and absorb the marshmallow mixture, providing structure.
• Emulsification: The butter acts as an emulsifier, helping to blend the marshmallow and cereal evenly without separation.
• Sugar's Role: Sugar in marshmallows caramelizes slightly when heated, contributing to the rich, complex flavor of the final product.
Frequently Asked Questions
What's the most common mistake people make when preparing Rice Krispie Treats? Overheating the marshmallow mixture, which can lead to a tough texture. Always use low heat and stir constantly.
Can I use large marshmallows instead of mini marshmallows? Yes, but they take longer to melt, and you may need to cut them into smaller pieces beforehand.
How do I store leftover treats? Store them in an airtight container at room temperature for up to three days to maintain freshness.
Can I freeze Rice Krispie Treats? Yes, they can be frozen for up to six weeks. Wrap them individually in plastic wrap and place in a freezer-safe bag.
What can I substitute for butter? Margarine or a plant-based butter substitute can be used, though the flavor may vary slightly.
Are there gluten-free options for this recipe? Yes, use gluten-free crispy rice cereal to make the recipe gluten-free.
How can I make the treats less sweet? Reduce the amount of marshmallows slightly and add a pinch of salt to balance the flavors.
What's the best way to cut the treats? Use a sharp knife coated with a bit of butter or cooking spray to ensure clean cuts.
Serving and Presentation Guide
• Traditional Presentation: Arrange the treats on a holiday-themed platter, showcasing their festive decorations.
• Gift Presentation: Wrap individual squares in cellophane bags and tie with a ribbon for a delightful homemade gift.
• Layered Display: Create a pyramid of treats on a cake stand for a striking buffet centerpiece.
• Individual Servings: Place each square in a decorative cupcake liner for easy pick-up at parties.
Conclusion
This holiday season, delight your family and friends with these irresistible Christmas Rice Krispie Treats.
Their perfect balance of texture and festive flair makes them a standout dessert at any gathering.
Easy to prepare and even easier to enjoy, these treats are sure to become a holiday tradition in your home.
So gather your ingredients, and let the festive baking begin!